What is proofing bread is a question with a pretty simple answer actually.
It will become obvious why I say it’s a simple answer when we talk about how a yeast dough is made, whether it’s for breads or pizza dough or other baked goods that contain yeast as an ingredient.
I’ll explain it to you just as I understand the absolutely essential concept of what is proofing bread.
Before that, I just want to mention that proofing is the same as proving. So, we have terms like proofing dough/bread or proving dough/bread. They’re the same.
Contents
Tools for Proofing Bread
1. Dough Proof Box: Brod & Taylor Folding Proofer & Slow Cooker
The role of this dough proof box is that it creates the perfect environment for proofing. It has a proofer model where you can choose temperatures between 70 to 120 degrees Fahrenheit. I advise you to experiment first with the 75-80 degrees F range. Another use for this box is making yoghurt or other foods that require fermentation. It even has a slow cooker mode for cooking in a Dutch oven.
2. Proofing Basket: Forsun Round Bread-Banneton
What’s the role of a proofing basket? It helps you achieve the perfect round or oval shape for your dough. And it can also create those nice rings that you often see in pictures for artisan or sourdough loaves. But you still need to establish the conditions yourself, like maybe proofing in the oven. The basket is only for achieving perfect shapes.
If you don’t want to get any of the above, that’s totally fine. Just read this article on what is proofing bread, learn about the ideal temperature needed for the two rising phases and proof the dough directly in the bakeware that you’re going to put in the oven. You can even use your oven for proofing, you’ll learn how if you keep on reading.
What Is Proofing Bread? Simple Definition
Proofing is a term used in the making of breads or other baked goods where yeast is used as ingredient.
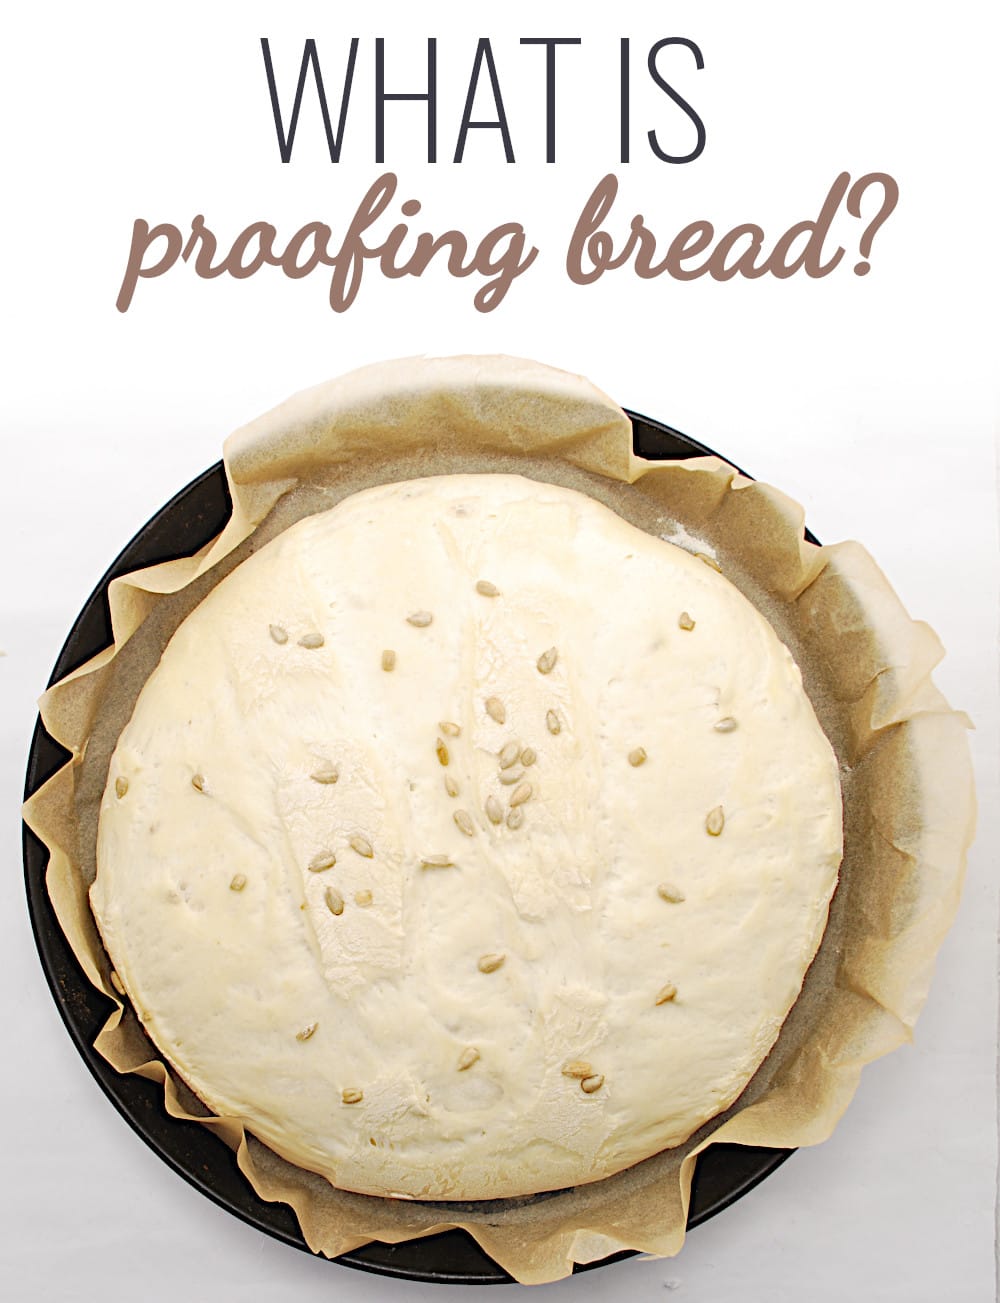
Simply put, proofing bread is the second rising phase (the last phase) through which the dough must be let to go through before being scored and baked.
That is why we cannot talk about what is proofing bread without actually mentioning what comes before proofing, since this is the last or the second rising phase, however you want to call it.
So, there are two dough rising phases, in order to obtain that unique delicious flavor that makes bread such a simply joy in life:
- 1st rising phase of the dough – called bulk fermentation (before shaping)
- 2nd rising phase of the dough – called proofing dough (after shaping)
During both phases the dough rests and it rises. It rises because the yeast consumes carbohydrates (starches and sugars) and it expels carbon dioxide.
Fermentation actually means that chemical process where carbohydrates are broken down into carbon dioxide.
Making the Dough: the Exact Steps (Proofing Included)
Taking things even further, by enumerating the steps involved in making a bread you’re going to realize exactly which is the answer to the question what is proofing bread.
1. Kneading
We all know what kneading is but it’s an extremely important first step that can’t be overlooked.
When the ingredients are mixed together and the dough is formed and worked over, the kneading part can be done by hand (it takes up to 20 minutes) or it can be done with a dough kneader (stand mixer or bread machine).
Kneading the dough by hand comes with just one stipulation: you need to knead the dough properly, which takes time, as I said a properly kneaded dough can take up to 20 minutes.
You need to knead the dough properly because the gluten needs to be developed properly, in order to create a strong structure that will be able to hold and trap the carbon dioxide that is produced during the rising phases.
If the dough is properly kneaded, you will get a light fluffy consistency and an awesome crust.
2. First rise: bulk fermentation
If you’re kneading the dough in a bowl by hand, cover it with a towel/plastic wrap and let it go through its first rise (the bulk fermentation phase).
The ideal temperature is 80-90 degrees Fahrenheit (27-32 degrees Celsius) and, depending on a number of factors, each rising phase can last from 45 minutes up to 2 hours.
There’s no exact time that can be offered that’s why we’re still going by the double in size saying to estimate when the first rising phase is complete.
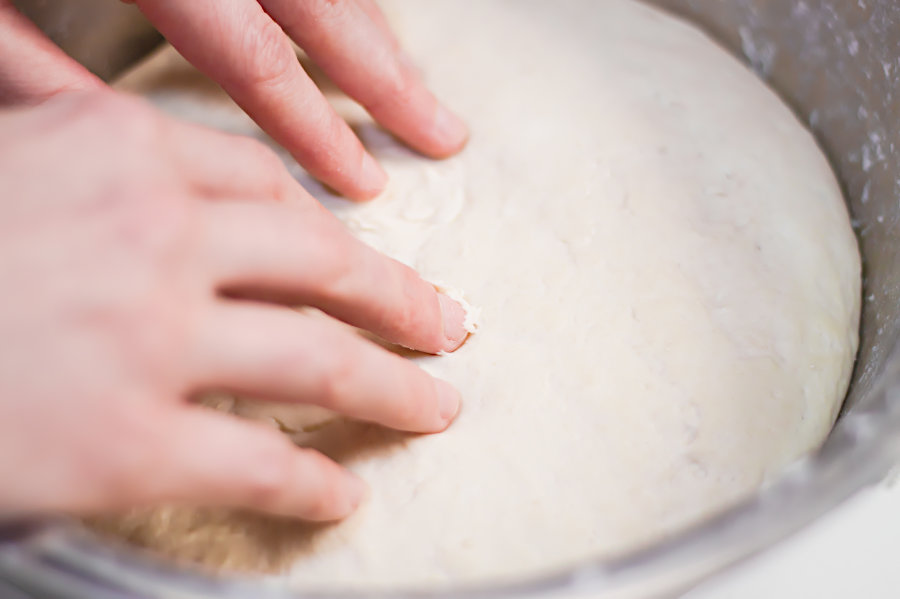
To test is the dough is done with its bulk fermentation phase, stick two fingers in the two to the second knuckle. Once you get your fingers out, the indentations should still remain, not being completely filled in by the dough.
3. Second rise: Proofing the dough
Once the bulk fermentation phase is complete, the dough is removed from the bowl, punched down and shaped.

Once the dough is shaped, it can be placed again in a bowl or in a proofing basket or even directly in the loaf pan. You can cover it with a towel again or not.
The proofing basket is especially helpful if you’re going to bake the bread in a Dutch oven. It will help you achieve a very nice oval shape.
If you’re going to place it directly in the loaf pan, you can use parchment paper or you can grease the pan with oil or not use anything at all. The dough shouldn’t stick to the pan and it should be released easily and immediately.
Now the second phase begins and that’s what we call proofing dough.
The dough achieves an increased volume than the bulk fermentation can achieve on its own and the flavor intensifies – these are the two reasons why proofing is such an essential phase in the making of yeast breads or baked goods.
When the proofing is complete, which again can take from 45 minutes up to 2 hours, the dough is scored and baked.
The dough will double in size again so, the proofing container must allow that room for the dough to rise. You need a container that it’s at least 2-3 times bigger than the dough.
What About Proofing Pizza Dough?
It’s the same thing, since pizza dough is a dough made with yeast, this one too needs to be proofed. And it’s the same process.

We have the kneading of the dough, the first rise called bulk fermentation, the shaping once the first rise is complete, the making of each individual pizza dough ball, and then comes the proofing.
Since proofing happens after shaping, it’s obvious that’s when we have to break the whole batch of pizza dough into individual pizza dough balls.
Meaning that the individual pizza dough balls are proofed and then, once the proofing of pizza dough balls is complete, you can roll the dough and start on adding your toppings.
The proofing of pizza dough balls can be done in the fridge or at room temperature or in the oven. The same can be done for bread dough, as well.
The easiest way is to place the dough balls into airtight containers and you can even let them to proof for 20-24 hours.
But you can also proof it for 1-2 hours if you want to make the pizza during the same day you kneaded the dough.
How to Proof Dough – How to Tell that It’s Perfectly Proofed
There’s actually a simple test that will let you know that the dough is done proofing.
With your finger, you create an indentation in the side of the dough. If the indentation remains and it doesn’t bounce back, then the dough is proofed enough and it’s ready for baking.
If the dough bounces back immediately and it instantly fills in the indentation it means that the dough is under-proofed.
Over-proofing definitely exists. When the dough is over-proofed, it develops punctures, which will let the carbon dioxide escape.
You can avoid over-proofing by also using a strong flour with a high protein content. A strong flour will let you develop a stronger network of gluten during kneading, which will not let the carbon dioxide easily escape.
If you want to know how you can salvage over-proofed dough, check out King Arthur and their solution. It basically goes down to deflating the dough, reshaping it and letting it to rise again until it doubles in size.
What Is a Dough Proofing Box?

A dough proofing box sounds intriguing but it can be actually represented by something very simple. You don’t necessarily have to buy a dough proof box.
I’m not sure if you were expecting it but a dough proofing box is your oven.
How does that work? How can an oven become a dough proofing box?
It’s simple actually.
The important aspect that you must remember is that you mustn’t turn on the oven at all during the proofing period.
In order to make your oven into a dough proofing box you must place 3 cups of boiling water into a pan on the bottom of the oven, place the dough on the middle rack and close the door.
Why would you do that?
Because it creates a warm environment for proofing the dough and it keeps it warm and humid. 70-115 degrees Fahrenheit is the temperature range that you can obtain.
Now that I’ve answered the question what is proofing bread, I’m pretty sure that you pretty much understand that the proofing dough concept, although essential, it’s a very simple one.


