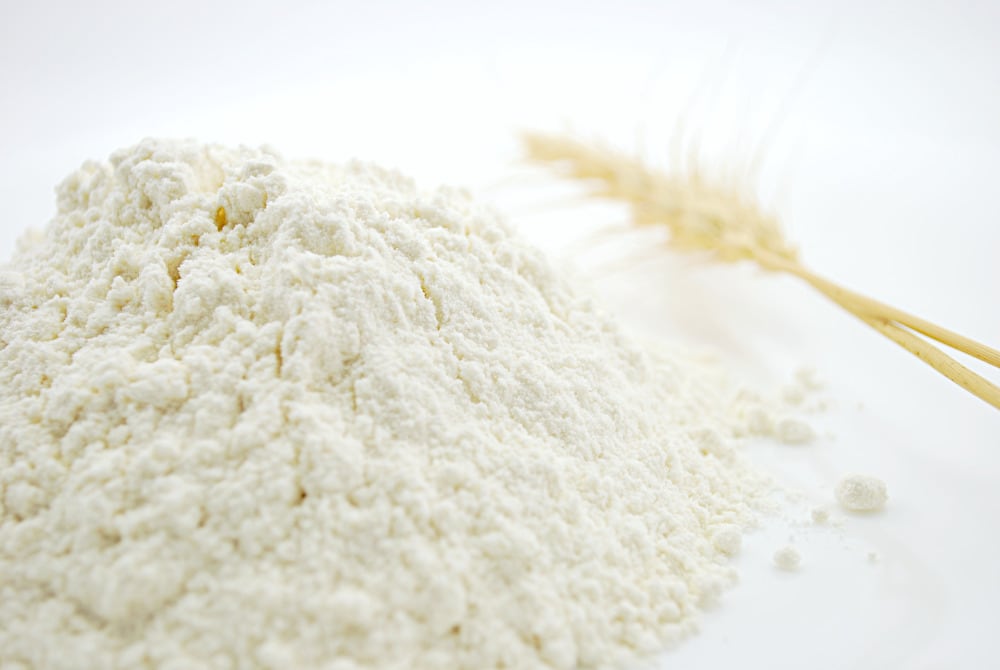
Today I’m definitely going to delve into a very interesting topic: how to make flour at home.
I’m pretty sure that it’s not something that people think about as their ultimate achievement in the kitchen.
But, if there is one thing I learned during these times, is that flour and yeast can be hot commodities that anyone wants to get their hands on. Those and toilet paper.
I’m definitely convinced that you can make your own yeast at home but let’s leave that for another sunny day.
Making our own flour will definitely be an interesting discussion. It might not actually persuade you to actually take the steps to make homemade flour but it will be a new thing to know about.
Also, check out my reviews for the best grain mills for bread flour if you want to see which are the best appliances for this purpose.
Contents
How to Make Flour at Home: Why We Should
Besides the fact that we have gone through a few months where flour wasn’t the easiest thing to come by.
And even disregarding the fact that some places had outrageous prices just because everyone had the time or necessity of making their own bread, which made flour hard to come by.
There are other reasons which might make you want to know how to make our own flour.
Fresh flavors
The important reason for getting into homemade flour is the freshness of the flour.
The absolute top quality that it’s hard to come by when we’re talking about what we can get from the shelves.
It’s all about the flavor and that’s certainly the case with freshly milled flour.
When we buy the bagged kind from supermarkets, it’s a product that has been milled weeks ago and not the freshest.
Fresh flour is a worthy ingredient that will offer delicious flavors to your baked products.
When we buy it, it’s important to check out the ingredients.
Make sure to buy unbleached flour.
Also, make sure that it’s not enriched. These two criteria especially apply when buying all purpose flour.
A few times I had the privilege of taking grains to a mill and have them transform the grains into freshly milled flour.
It turned out to be a delicious ingredient that helped my bread machine make some of the best most beautifully risen breads.
At that time, I wasn’t into making the dough all by myself.
I wasn’t interested in discovering the intricacies of the two rise phases, finally understanding what proofing is, and the multiple ways in which the dough can be baked.
Types of Grains to Use
Most berries can be turned into flour, it’s just a matter of what type you actually want to make at home.
If you want to make bread flour, you need to buy wheat berries. A wheat berry is the whole wheat kernel, which is why you will get hard flour, which is best for making bread and for making sourdough.
However,
Bread flour is actually divided into two categories: white flour and whole wheat flour (the darker one).
White flour is milled from hard white wheat.
Whole wheat flour is obtained from hard red wheat.
It’s a matter of white and red but the hard wheat is what these two bread flours have in common.
Soft white wheat berries are what you need to mill if you want to make cake and pastry flour. It’s the type of flour that’s higher in carbohydrates and lower in gluten.
If you want to make rye flour, you need rye berries. That’s an entirely different berry than the wheat berry.
Where would you get the grains from?
As far as I’m aware, health stores sell grain in bulk and the price is not bad at all. Maybe you can find alternative sources, depending on the area you live in.
You need to buy them in bulk because you’ll need about a pound of wheat berries to make 4.5 cups of flour. That will be good enough for a nicely sized loaf.
Basically, whatever amount of grain you mill or grind will result in about the same amount of flour you obtain. There’s no need for complicated calculations, it’s a 1:1 ratio.
As you’re going to see, you need a grinder or a mill of some kind to mill the berries.
Or you need to use a very powerful blender, like the blenders from Vitamix.
We’ll be talking about the actual process of how to make flour at home later on.
Before that, I just wanted to say that making oat flour is one of the easiest things to do in a kitchen.
You just need oats and a blender or a food processor. Either of those two kitchen appliances will turn oats into oat flour.
If you want gluten-free oat flour, just buy certified gluten-free oats.
Do You Need Your Own Grain Mill?
You actually don’t need an electric grain mill but they do come in handy if you get into the habit of frequently making homemade flour.
But if you just want to experiment with a few grains and see how the whole thing turns out, you can do that will kitchen appliances that can be found in most households.
What can you use as a substitute for an electric grain mill?
Well, I will review a manual grain mill just below, I consider it to be a good replacement. But there are other solutions, as well.
How to Make Flour: Use a Coffee Grinder
You can use a coffee grinder. Mostly everyone owns a coffee grinder from those times when we weren’t addicted to using pods, getting our coffee in a few seconds by the simple press of a button.
Pour the berries into your coffee grinder but keep it only half full to enjoy a smooth product, an even grind.
The more you leave the grinder grind the less coarse the homemade flour will be. I advise you to let it grind for a minute before stopping.
It’s very easy, it will just take a bit of time until you get a quantity good enough for baking.
Be aware that the grinder is not capable of offering the different types of textures that an electric grain mill can help you achieve without too much work on your part.
But it works if you want to experiment with how to make homemade flour. Just don’t expect the finest finished product. To be honest, it will be quite coarse.
You can sift the flour afterwards. There will be bits of grain caught by the mesh that can be poured back into the coffee grinder.
Blenders can be better
Instead of using a coffee grinders, which can only grind a few grains at a time, I actually recommend using a Vitamix blender.
They even have a Vitamix Dry Grain Container that is sold separately especially for making flour at home.
Choosing a Grain Mill
If you’re ready to take on the quest of how to make flour at home and transform it into a regular habit, I recommend checking out the best electric grain mills.
You can see if a grain mill ends up being what you want and need.
I must admit that the prices are quite expensive. I imagine that quite a few will be deterred by this aspect. And continue using store-bought flour and I can totally understand that.
But it’s still worth understanding what the best electric grain mills can offer.
Even if it’s just to understand if you’re ready to make homemade flour or if it’s best to continue on the easier route of just buying it directly milled.
Before actually reviewing some of the best electric grain mills, I just wanted to mention that if you already own a KitchenAid stand mixer, it doesn’t matter which model, you can buy their grain mill attachment. It’s not exactly cheap but it can be an easier solution than getting a separate grain mill.
1. Roots & Branches Hand Operated Mill for Wheat, Rice, and Small Grains
I’m aware of the fact that I said that I was going to review some models for choosing the best electric grain mill.
And yet I’m first recommending a manual grain mill. The Roots & Branches Hand Operated Mill for Wheat, Rice, and Small Grains.
This grain mill will require some effort from your part, this a screw-type steel grinding mechanism.
You will definitely get a bit of a workout for your arms by cranking the handle so, buy this only if you don’t have problems with your wrists, arms, shoulders, you get the point.
Let’s see why you would choose this one instead of a much more expensive electric grain mill.
Features
The Roots & Branches Hand Operated Mill is very affordable. The price doesn’t even come close to the price of an electric grain mill.
It’s small, it will fit into a drawer without taking counter space.
And it’s easy to assemble and to operate.
Manual labor definitely shines through when it comes to simplifying things. There’s no worry of something getting broken or of a fuming motor.
This manual grain mill has the chance of being with you for a lifetime.
It’s also versatile, as its name suggests. You can mill a variety of grains in terms of sizes, rice, oats, etc. It really works for grinding anything.
And, thanks to its adjustable knob, you can choose how coarse or fine you want the finished product to be. No worries, you’ll be able to make fine bread flour.
What can I say?
The Roots & Branches Hand Operated Mill is an affordable, high quality, well made, manual mill that can be used for grinding a variety of grains and rice and oats and I really like it.
It’s just a fantastic alternative to electric grain mills and it can also represent an amazing gift for bread bakers.
2. NutriMill Classic High Speed Grain/Flour Mill
If you want to know how to make flour without doing any manual labor then you need to consider buying an electric grain mill, like the NutriMill Classic High Speed Grain/Flour Mill.
The high price is to be expected so, I’m actually going to skip talking about that. It’s actually a bit cheaper than others. Let’s move straight to what it’s capable of doing.
Well, before that I actually want to mention that I love the simple look and the fact that it’s quite small. It won’t take much space and the design is quite nice, that’s a very good first impression.
Features
It might not seem big but it’s powerful and it’s capable of grinding up to 5 cups of flour per minute.
Also, it has a powerful 1200-watt motor.
You can also grind up to 20 cups of flour at a time. This electric grain mill includes a large bowl capacity.
That’s a lot of flour in a very short amount of time. That’s definitely the advantage of using an electric grain mill, as long as the price doesn’t chase you away first.
Other expected features include the options to get different textures, from fine to coarse flour.
And the ability to grind basically everything, all types of grains (gluten-free grains, too), rice, oats, corn, split peas, quinoa, soybeans, and beans.
The difference in textures is obtained through the adjustable motor speed, which is basically a knob. It’s easy to operate and easy to figure out.
It also has some added features, like 50% noise reduction and improved motor cooling for a longer life.
How to Store Homemade Flour
You can store homemade flour in the pantry for up to three months or refrigerate/freeze it for up to 6 months.
Use an airtight container to prevent oxidation, which can lead to a mildly bitter flavor.
Cool dark places are ideal for storing flour properly.
However,
The whole point of making homemade flour is to be able to always use fresh flour.
I recommend making smaller quantities and use the freshly milled flour within a week, in order to enjoy the nuttiness and sweetness that freshly milled wheat berries carry.
Is It Cheaper to Mill your own Flour?
For those who want to know how to make flour at home in the hopes that it will be cheaper, this question is a very good one.
Is it cheaper to mill your own flour? I would say no.
There’s the cost of buying a best electric grain mill, which is very high.
The cost of buying grain berries.
And the additional time involved in milling the berries.
If you get a manual grain mill, the cost will be considerably lower but the whole operation won’t be as fast.
There are advantages to learning how to make flour at home but I would say that the lower price might not be one of them.


